
Well-designed Business Cards are vital for any budding gardening service, whether you’re a solo gardener or own a landscape gardening company.
As part of our Adobe Creative Suite series of design tutorials, we’ll show you how to design a gardening Business Card using our free, easy-to-use template in Adobe Photoshop.
Follow the video and our step-by-step guide to make a striking Business Card and get your gardening services noticed.
Video Tutorial
Step-by-step breakdown
Now you’ve watched our video tutorial, you’re ready to get started on your own gardening Business Card. Read on for a detailed breakdown of each step…
Step One: Open the template
To get started, you’ll need to download and open our free Business Card template. We offer templates for many different dimensions, but the standard Business Card size in the UK is 85 x 55 mm, so we’ll use that one in this example.
You’ll see the bleed, trim and safe areas marked out on the template, like this:
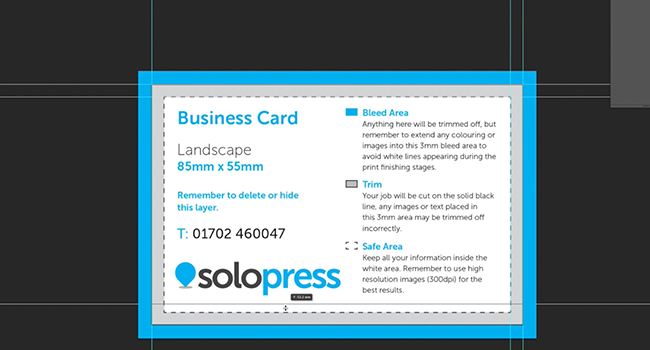
Next step, making guides. To do this drag from the rulers on each side of your document to the safe and bleed box lines. Then, add two additional lines on the central axis.
Top tip: If you’re using Photoshop CC, these lines will automatically snap to the centre of the document if pulled over it.
Step Two: Create a fill layer
A fill layer will give you more options for your Business Card design so you can add colour, levels or patterns. To create a fill layer in your template:
- Click Layer in the top-left corner
- Then click New Fill Layer
- Finally, click Solid Colour
With this selected, change the colour using the Colour Picker.
Step Three: Add your images
With your fill layer selected, you can now add your images by dragging them directly into the document from your Finder (Mac) or Explorer (Windows).
When you drag an image into the template, you’ll have the option to resize it before it is placed. You can change size, rotation and other qualities in Photoshop by using Free Transform. To do this, click Edit – Transform – Free Transform.
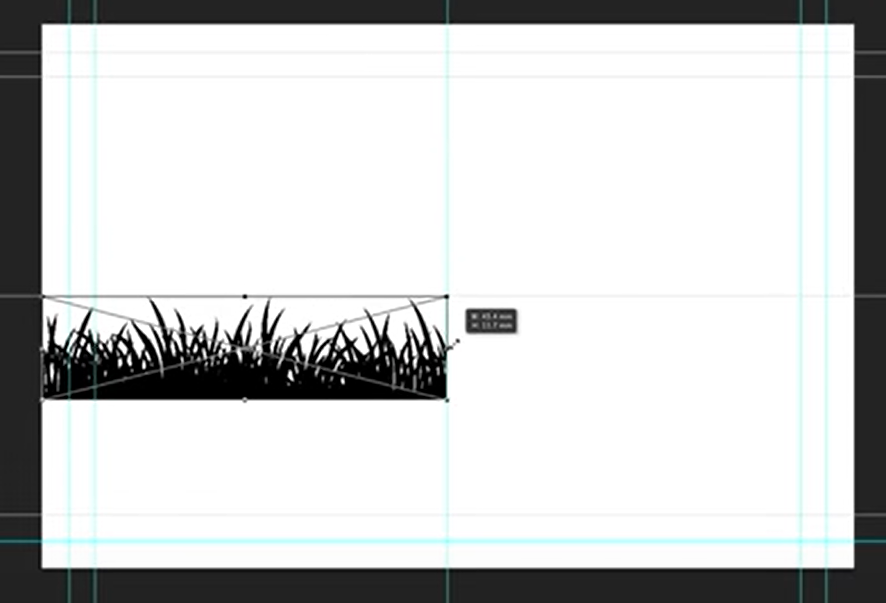
Top tip: In the video, a rectangle is drawn at the bottom to act as a solid for the grass to sit on. To do this, use the Rectangle Tool found in the Tool Bar.
Step Four: Join the images
Joining two images can make colour editing easier.
In the video, we connect the grass and rectangle layers by highlighting them all in the Layers Tab. Then, right-click and select Convert to Smart Object to create one single layer.

Step Five: Change the colour
To change the overall colour of an image, right-click on your connected layer and select Blending Options. This will open a basic pallet of image editing options.
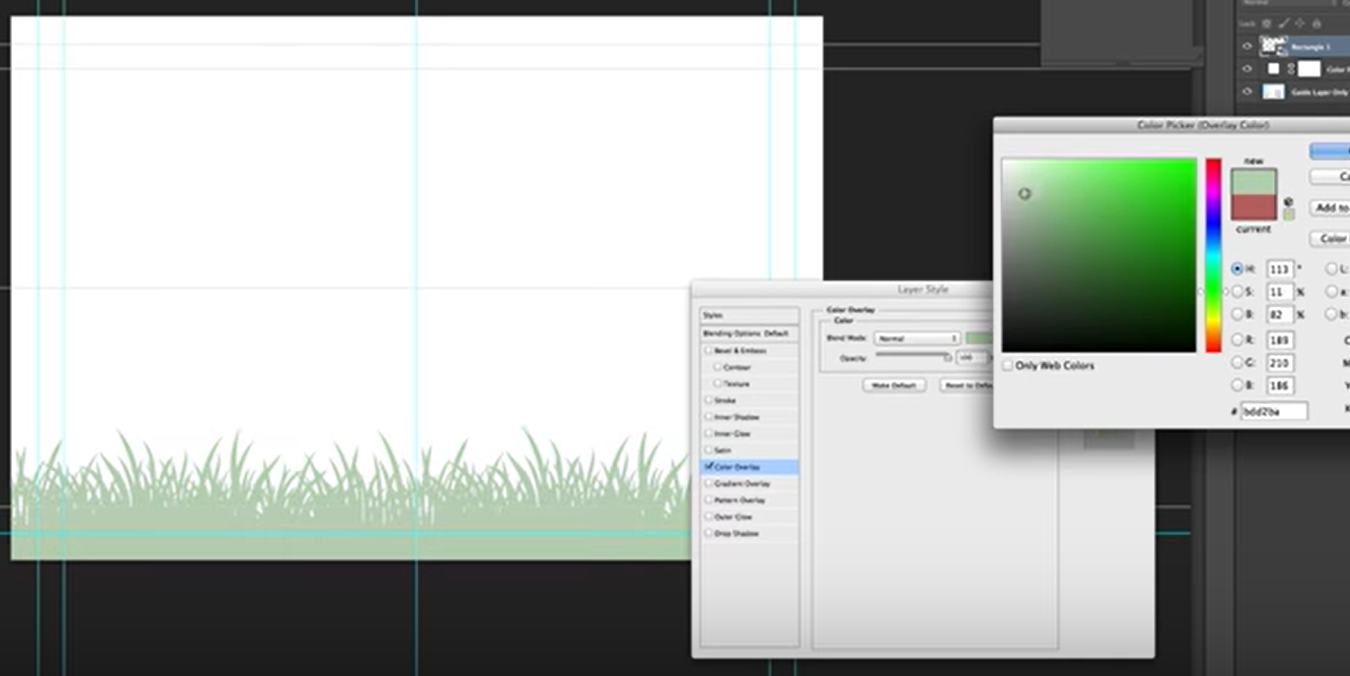
Top tip: For more variety, click Color Overlay to bring up a gradient colour chart, then click on the specific shading to see the image change.
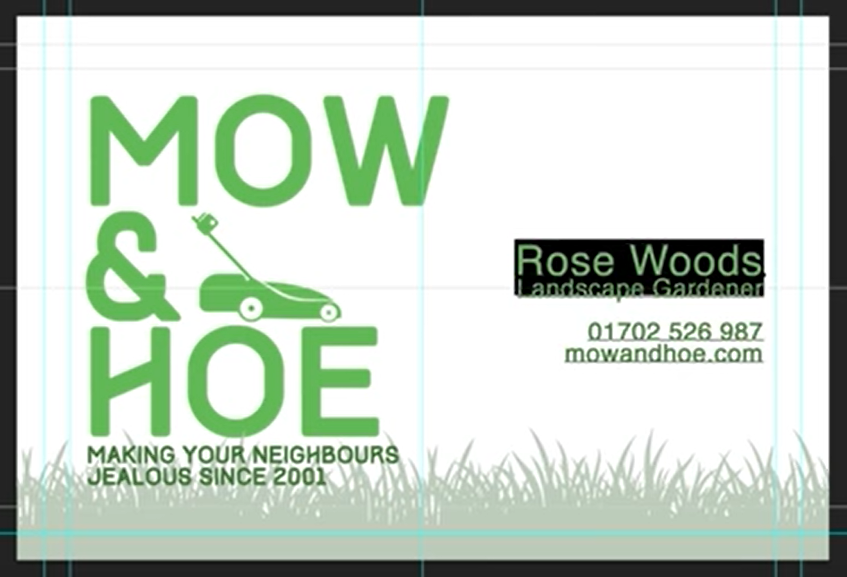
Step Six: Add text
You can type text on your template using the Text Tool located in the Tool Bar. To change the properties of your text, including font, size and spacing, click the Character Panel.
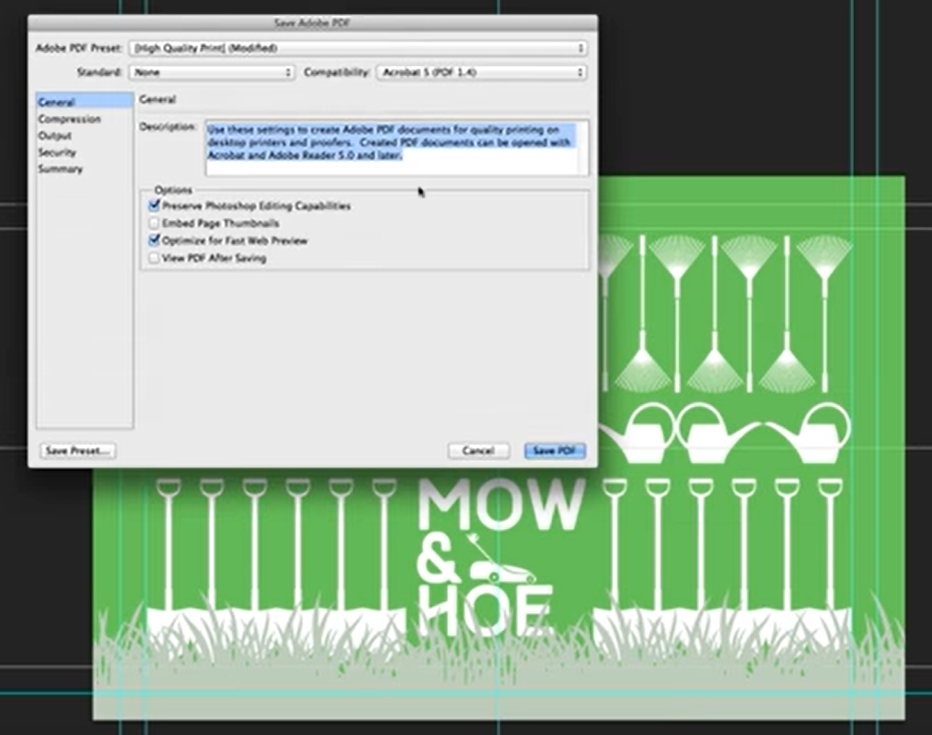
Step Seven: Save and create a new template
When the front of your Business Card is done, save it as both a PSD (Photoshop Document) and a PDF (Portable Data File). You need the PSD to make any changes, but the PDF will be the printed form you attach in the order.
Then, open the PSD file again as it’s time to create the back.
Top tip: It’s easier to create the back of your landscaping Business Card from the existing template as you can quickly match the colours used on the front.
Step Eight: Duplicate your images
On the back of our example, we used a repeat pattern of several gardening tools. To duplicate your images, right-click on its layer and select Duplicate. This will give you a choice of where you’d like it pasted.
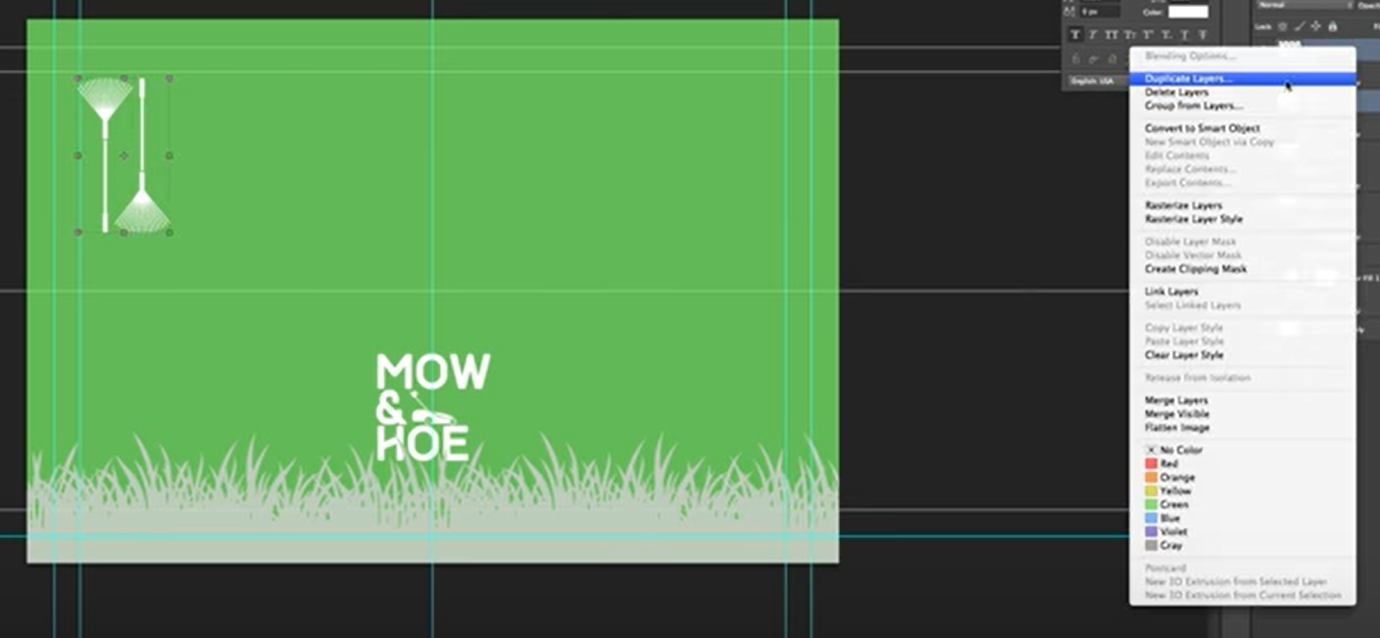
We then rotate the images using Free Transform to create the pattern. You can duplicate numerous images at a time, as long as they are all selected.
Top tip: When you duplicate an image, each duplicate will appear as its own layer. Therefore, make sure you have the right size and colour before duplicating.
Step Nine: Delete the layer and save
When you have completed both sides of your gardening Business Card, you need to delete the template layer as this could affect your final product.
Finally, save the back of your Business Card as a PSD and PDF.
When you come to order your Business Cards, you may wish to consider our range of eco-friendly Business Cards that are printed on 100% recycled paper – something that would reflect well on a gardening business. Choose the type of print, size and number of sets, then upload your artwork before checkout.


This tutorial is excellent, I am looking to create something similar for a business I am just getting off the ground. Thank you.
Very cool. A friend of mine has his own small gardening business so I will recommend this to him.