
Learn how to design this Rustic Eco Themed Wedding Invitation in Adobe Photoshop with our expert, easy-to-follow tutorial.
This wooden eco look is a huge trend for weddings at the moment, so stay ahead of the pack and make your invitations really stand out!
Video Tutorial
Music featured in the video: “Storyteller” by Jahzzar (http://www.betterwithmusic.com)
Starting Line
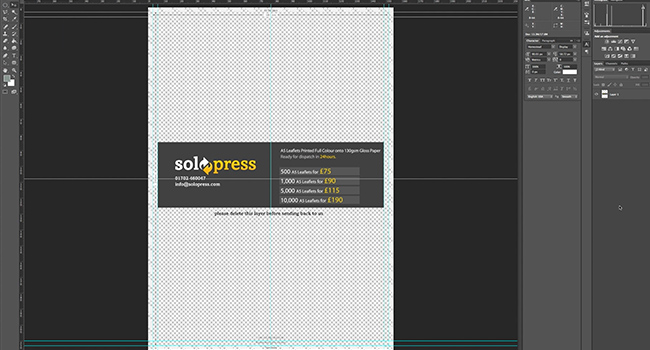
Head to our website to download the free Photoshop A5 template guide as a base for your wedding invitation. Open the Photoshop file, where we have created a guide layer that will help you design your wedding invitation — this includes the bleed area, trim and safe area.
Bleed Area — Anything here will be trimmed off, but remember to extend any colouring or images into this 3mm bleed area to avoid white lines appearing during the print finishing stages.
Trim – Your job will be cut on the solid black line, any images or text placed in this 3mm area may be trimmed off incorrectly.
Safe Area — Keep all your information insides the white area. Remember to use high-resolution images (300dpi) for the best results.
Got it? Okay!
Create a new guide by clicking and dragging on the vertical and horizontal Ruler (if your Ruler does not appear in Photoshop press Command + R). Create 4 new guides on the safe area line. You need to also make 2 guides for the centre of the your invitation. Just pull the guides and they should snap as you approach the middle (CS6, CC).
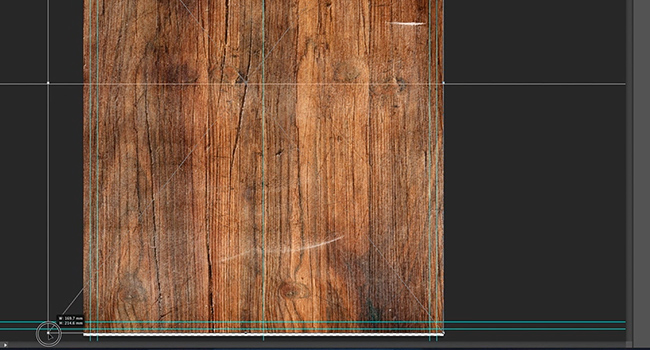
Insert your background by dragging it directly into the document from your Explorer or Finder windows (PC or Mac respectively). Resize the image to fit the area, hold shift as you are doing this to stop the image from distorting. After placing your background you can now delete your template layer, as you will no longer need it.
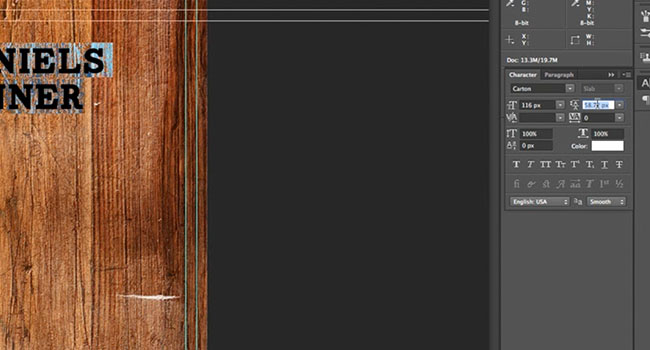
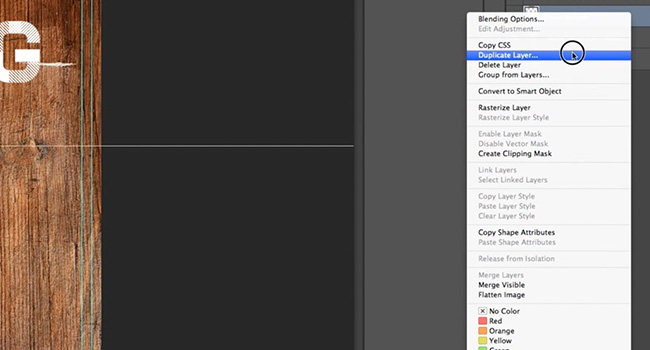
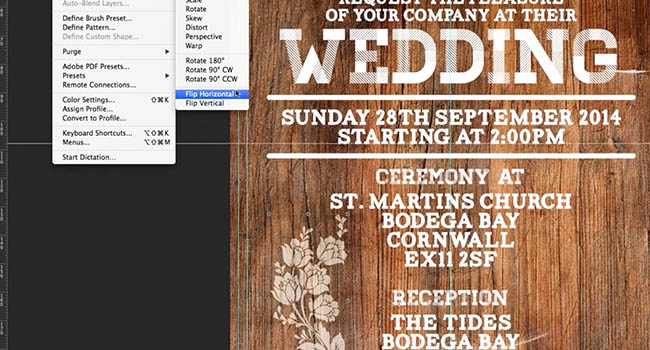
Enter your text using the Text Tool from the toolbar. You can edit the properties of your text such as font, size, spacing and much more by using the Character Panel that can be opened from the bar at the top of the document. Make separating lines by using the Rounded Rectangle Tool. To easily change the colour of the lines, right click on the layer and go to Blending Options. In here go to Color Overlay and select the colour you need.
To separate the text, add another line on each feature of the invitation. To copy the line you have already made, right click the layer and select Duplicate.
To give your font a classic print look, change the fonts subtly between paragraphs or on key words. For example we have used 2 different kinds of fonts, but the differences are subtle.

Finishing Touches
We are going to add some flowers for detail. To add an image in just drag it in like you did with the background. Resize and rotate so it fits in the design. We are going to give it a faded look so right click on the layer and select Blending Options. Under Blend Mode select Soft Light. Now the image will appear aged and faded on the background.
Once you are doing, save your invitation as a PSD (Photoshop Document) and a PDF (Portable Document Format). For the next steps to get your invitations printed head to Solopress.com.
Something Blue
If dark wood isn’t your thing, try a white wood texture and add a splash of colour to your text!
Adding a personal touch to you wedding day will make it even more special.
Get In Touch
If you have any comments or questions regarding designing a wedding invitation, please use the comments section below and we’ll do our very best to answer your queries.
For more expert video guides to professional creative applications, remember to Subscribe to our YouTube Channel and keep checking back to the blog!


It’s beautiful – definitely something to look into next year when I start planning my wedding.
Love the design of these. I always think it is lovely to receive a handmade wedding invitation 🙂